Hello! I’m so glad you’re here. Are you in search of an easy mehndi design step by step? You’ve found the right website. I am a massive fan of mehndi, and I’d like to demonstrate how easy it is.
You don’t have to be an expert. Within my portfolio, there are numerous designs. Some are mine, while others are inspired by incredible designers that I follow on Pinterest or Instagram.
Mehndi Design Practice Step By Step
My opinion is that starting with basic designs is the best idea. Let me show you some easy ways to get started.
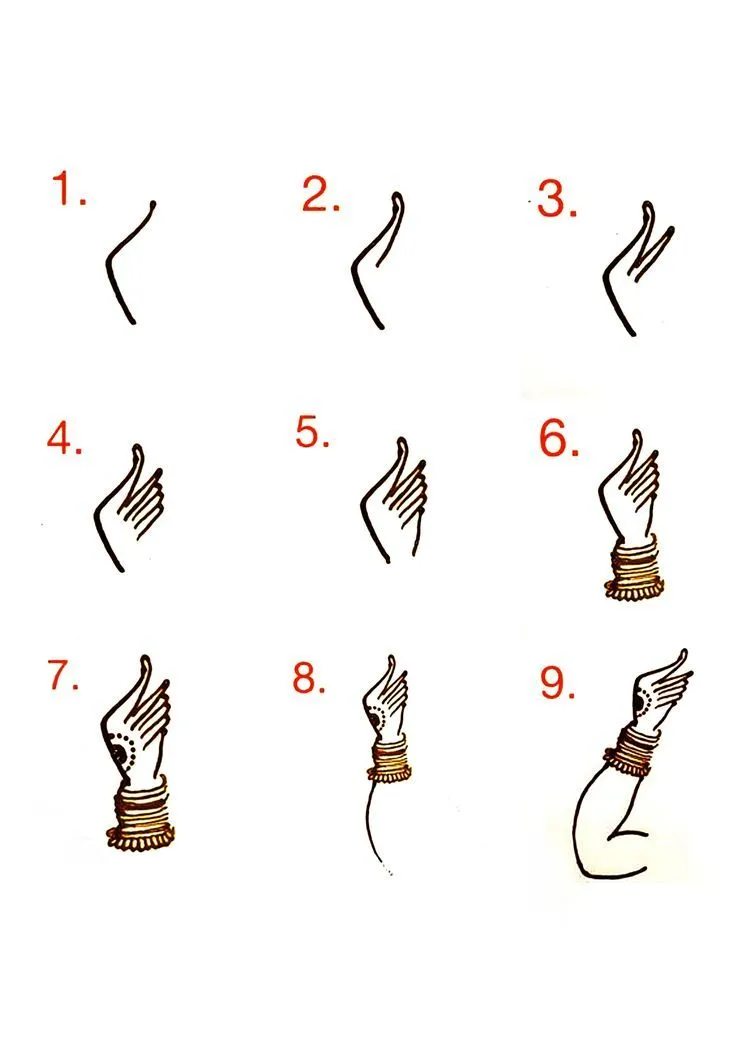
Step 1: Holding the Cone Correctly

Then, you should hold the cone in the same way as a pen. Your grip should be secure but not too snug. You must be at ease. Make sure you squeeze the cone with care at the very top. This will give you a good grip. Make dots and lines on paper.
It’s a fantastic method to begin your mehndi practice step-by-step.
Step 2: Drawing Basic Lines and Curves
Lines are the foundation of mehndi. Learn to draw straight lines. Try making curly lines and wavy lines. My opinion is that these simple curves create designs that look great.
They are often used particularly for borders and vines.
Step 3: Making Dots and Humps
Dots are incredibly simple and provide a lot of depth. You can create tiny dots or large ones. Humps are basically U-shapes that are connected in a small size. They’re perfect to fill borders. It is possible to practice creating rows of bumps.
It’s a crucial component of many mehndi designs step-by-step.
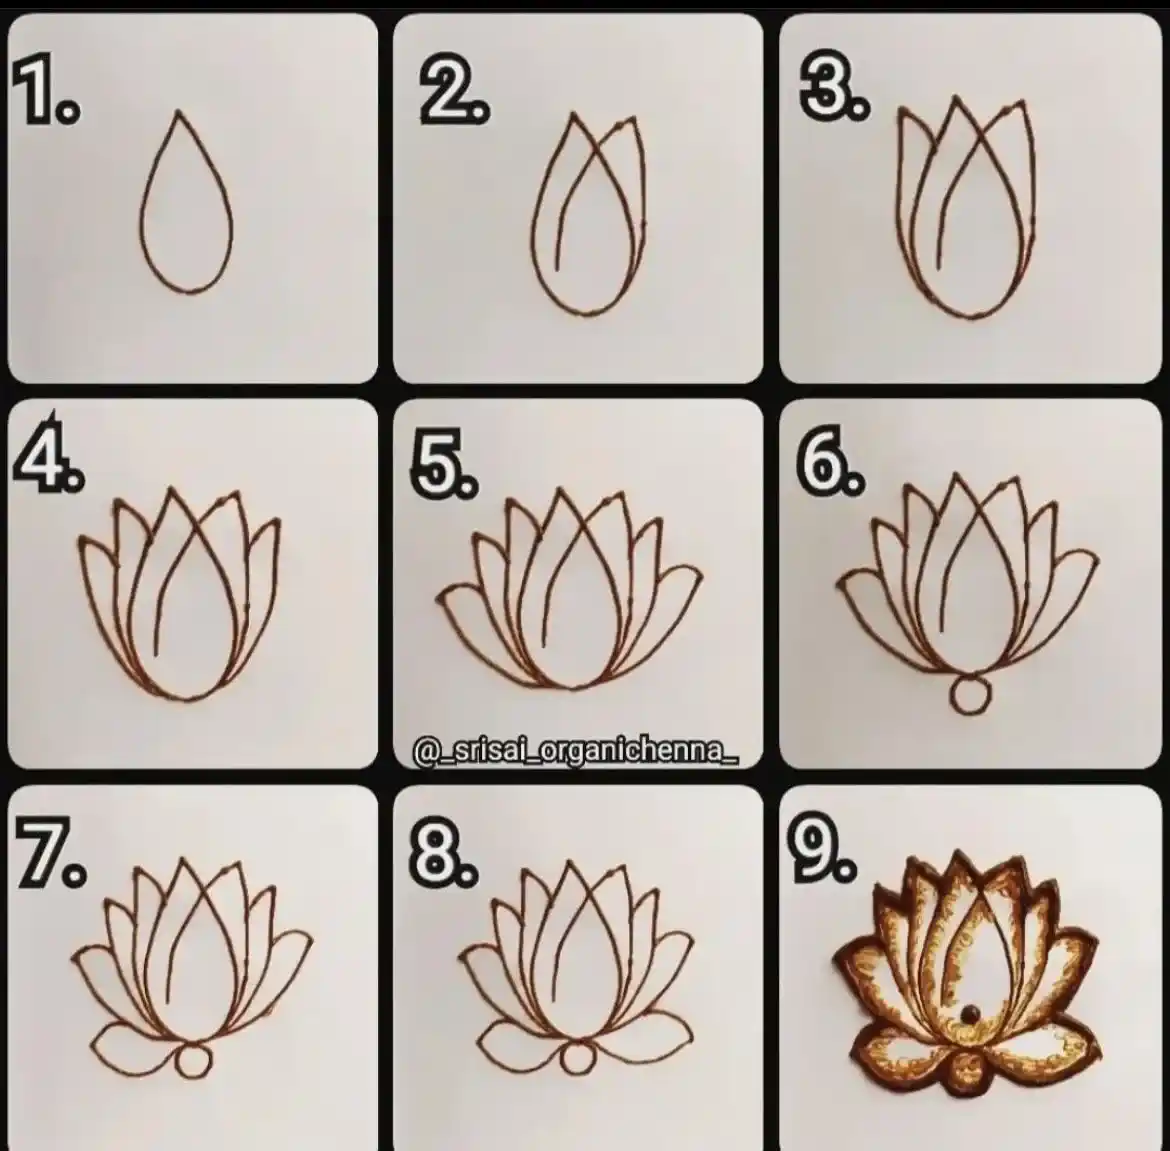
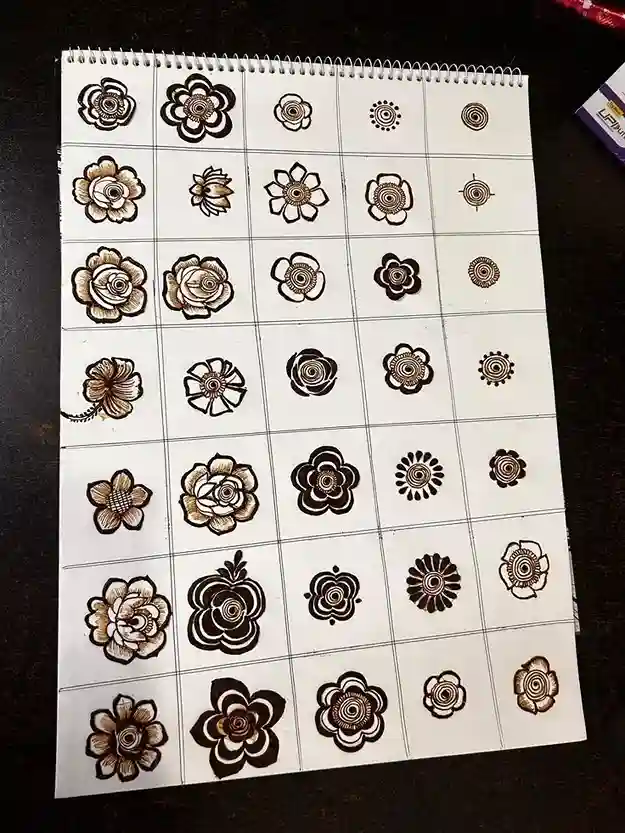
Step 4: Creating Simple Flowers
A flower that is simple to draw. Begin with one dot in the middle. Then draw five to six petals around the dot. The petals could be U-shaped. You’ll be awestruck by this design because it’s simple.
It’s a nice addition to any style.
Arabic Easy Mehndi Design Step by Step
Arabic mehndi is very well-known. It typically has thick lines as well as flowing designs. It doesn’t completely cover the hand. It looks contemporary and open.
I’ll show you how to make a simple Arabic mehndi design step by step.
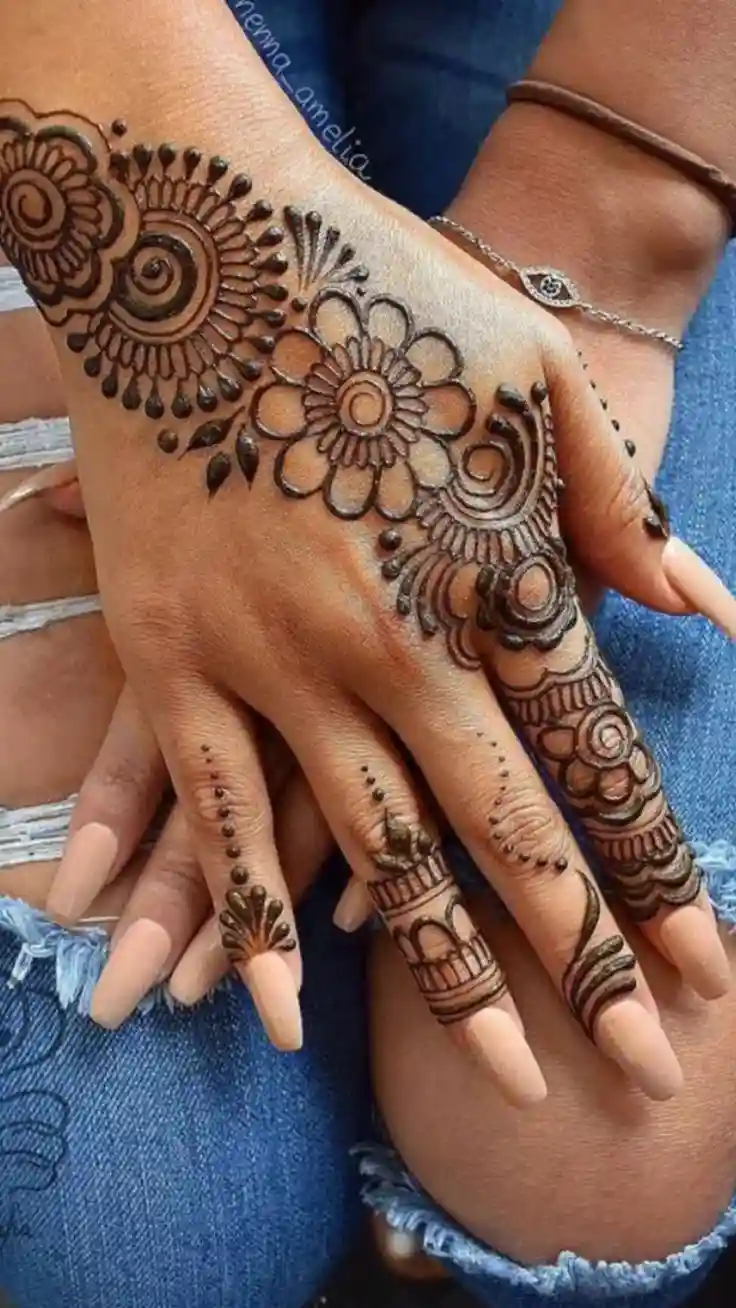
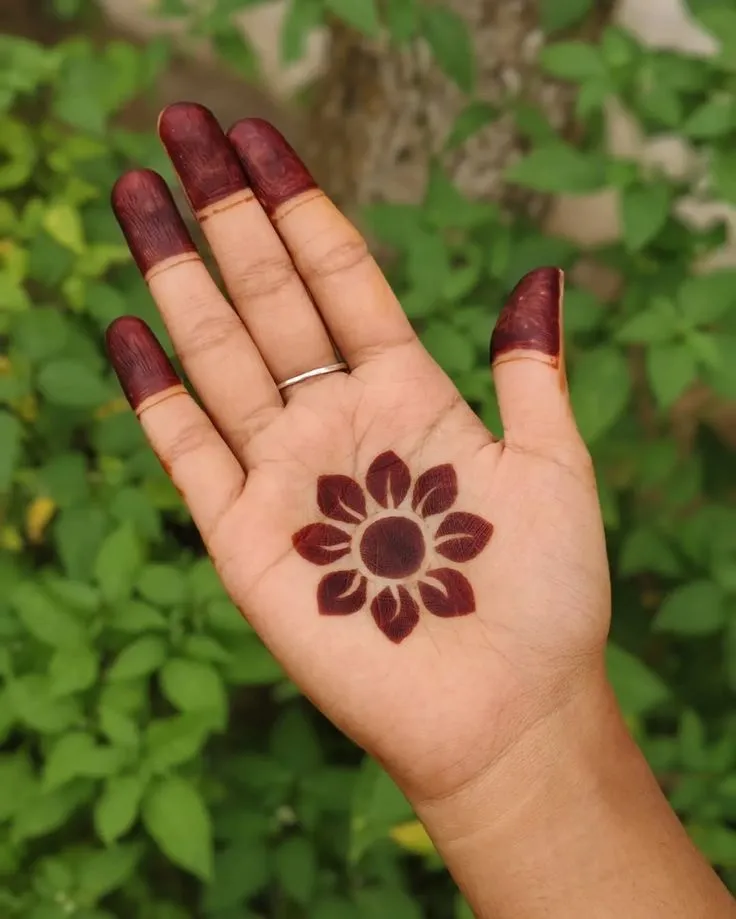
Step 1: The Main Flower
Begin with a large flower in the palm. Set it slightly off-centre. Create a spiral to the middle. After that, add some layers of flowers around the spiral.
Create the outline of the flower to make it stand out and be dark.
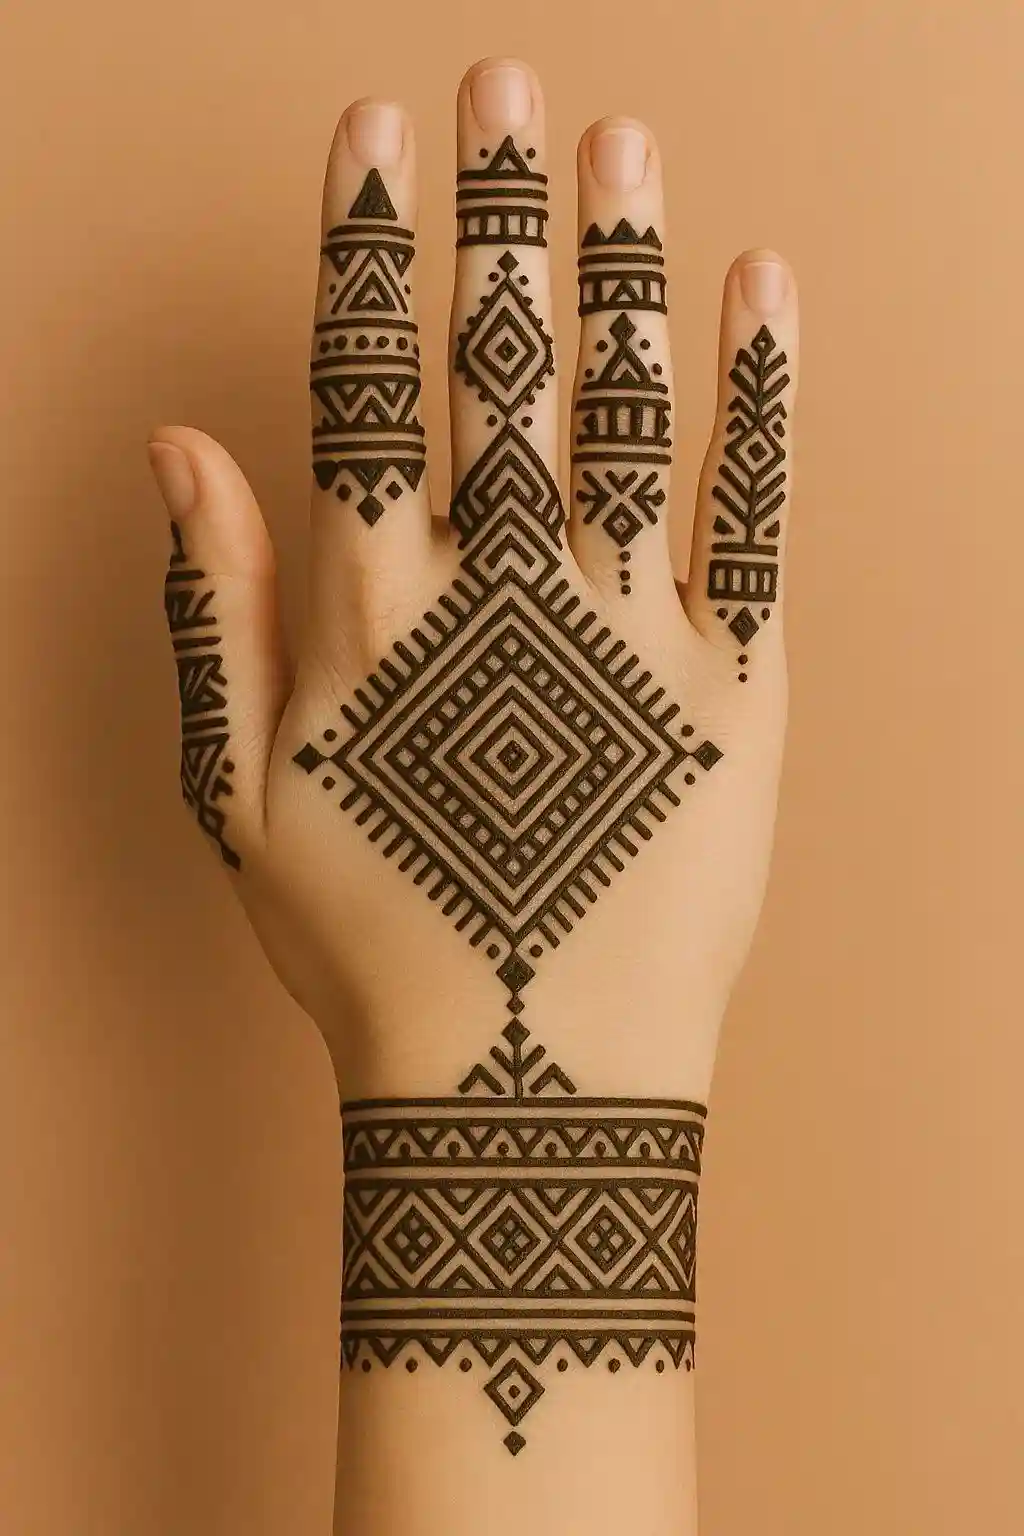
Step 2: The Diagonal Vine
In the centre of your flower, create an elongated vine. The vine should run diagonally across your hands. It may extend from your wrist up to the index finger.
It is a traditional Arabic style. The flowing vines make your hands look elegant.

Step 3: Adding Leaves and Shading
On the other side of the vine, you can add leaves. Create the leaves with sharp lines. Within the leaves and flowers, you could do some subtle shading. Draw thin lines within the petals.
This provides a step-by-step guide to your mehndi design.
Step 4: Detailing the Fingers
For your fingers, try to keep it simple. It is possible to draw more minor variations of vines. You can also create patterns using dots and lines. In our society, embellishing the tips of your fingers is common.
The tips can be adorned with henna to create an authentic finish.
Beginner Henna Designs Step by Step
If you’re a complete novice, this design is ideal for those who are new to the field. They’re very easy to make. They look amazing and aid in building confidence.
Based on my experience, beginning small is the most effective method to learn.
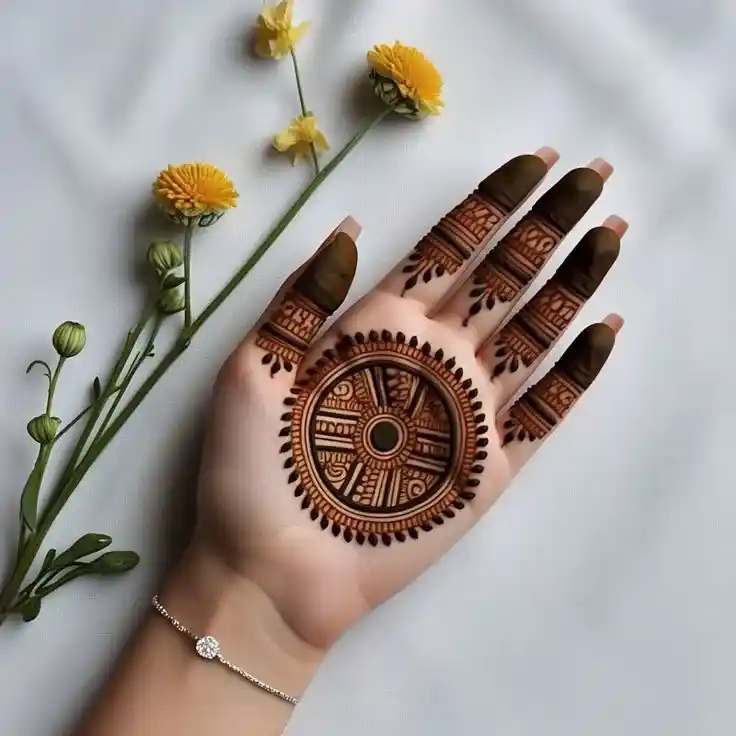
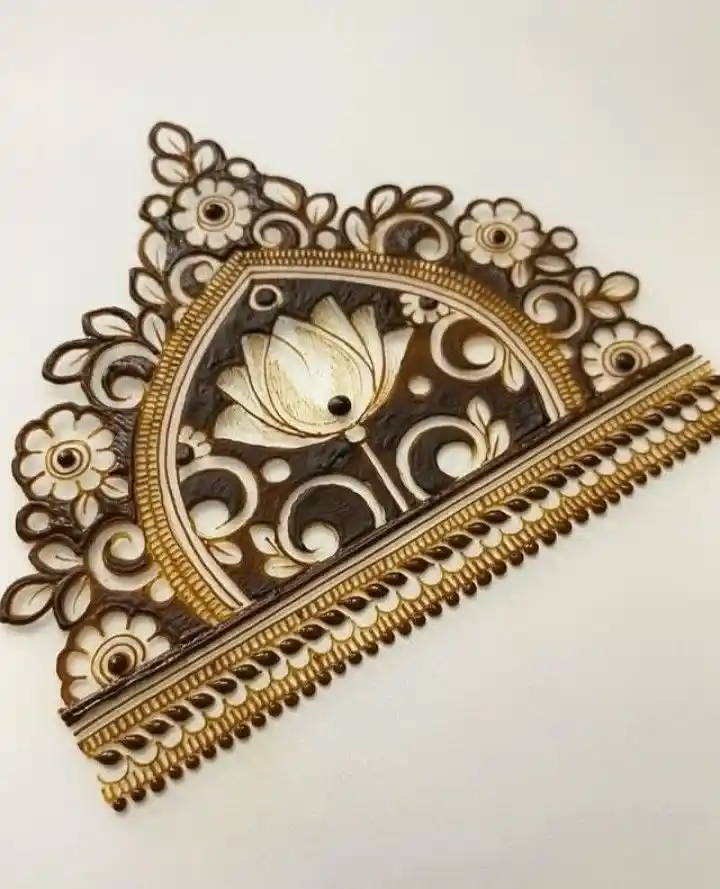
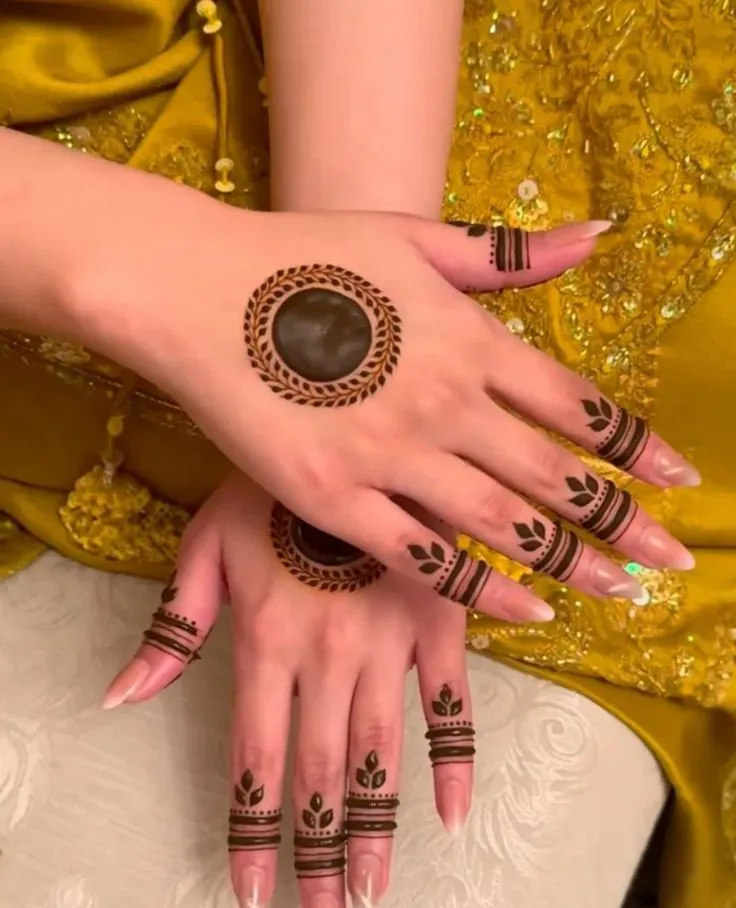
The Central Mandala
Mandalas are circular patterns. It’s a fantastic henna beginner pattern, step by step. Outline a circle in the middle of your palm. After that, create an edging of petals or bumps around the circle. It is possible to add another circle of dots around the.
It’s straightforward and looks well-balanced.

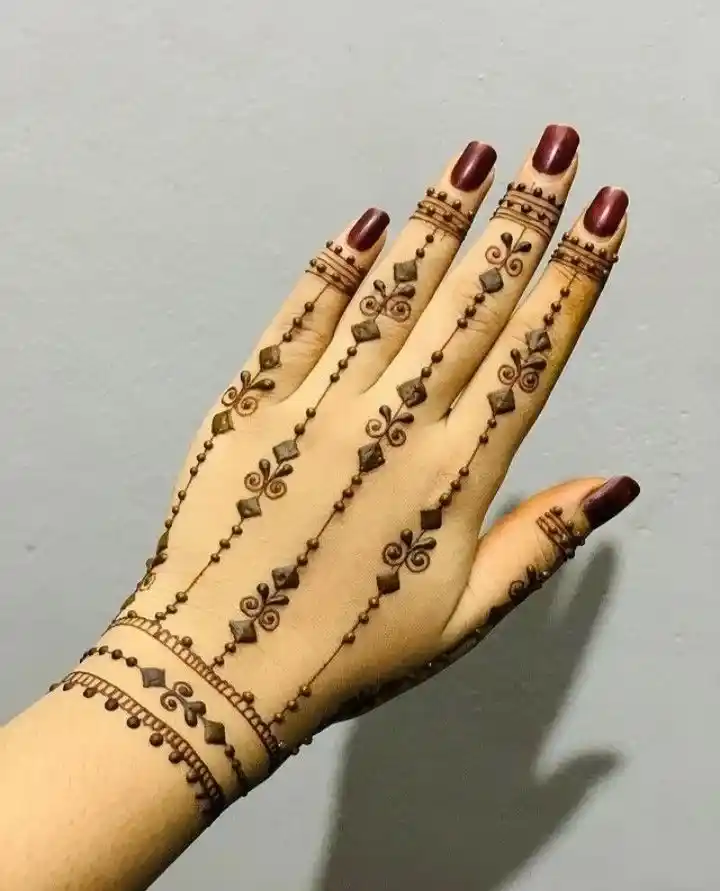
The Finger Bands
This design is fashionable. You decorate your fingers. Create simple bands on two or one finger. You can draw dots, lines, or crisscross patterns. It’s like wearing rings.
I’m sure you’ll find this look to be very elegant.
The Corner Vine
Instead of using a huge style, consider a smaller vine at one corner. Begin with a tiny vine at the bottom of your finger. Let it grow towards your wrist.
You can add a few leaves or an elongated flower. It’s a lovely and straightforward design.
The Bracelet Design
A bracelet style is an excellent choice. It is as simple as drawing a design on your wrist. It could be a simple flower band. It could also be a geometric design.
This pattern is great to avoid having an ointment on the palm of your hand.
RELATED POST: Top 80+ Trending Dubai Mehndi Designs
Bridal Mehndi Designs Step By Step (Easy ways)
Bridal mehndi can be highly detailed. However, you can make an easy version. Here’s a simple mehndi design step-by-step to create a basic bridal look.
You can include items that are unique to you.
Step 1: Planning the Design
Make a list of what you’d like to do. Are you looking to add the initials of your partner? Perhaps the date of your wedding? In my opinion, adding personal touches makes bridal mehndi special.
Make sure to choose the theme of the day, for example, flowers or the use of paisleys.
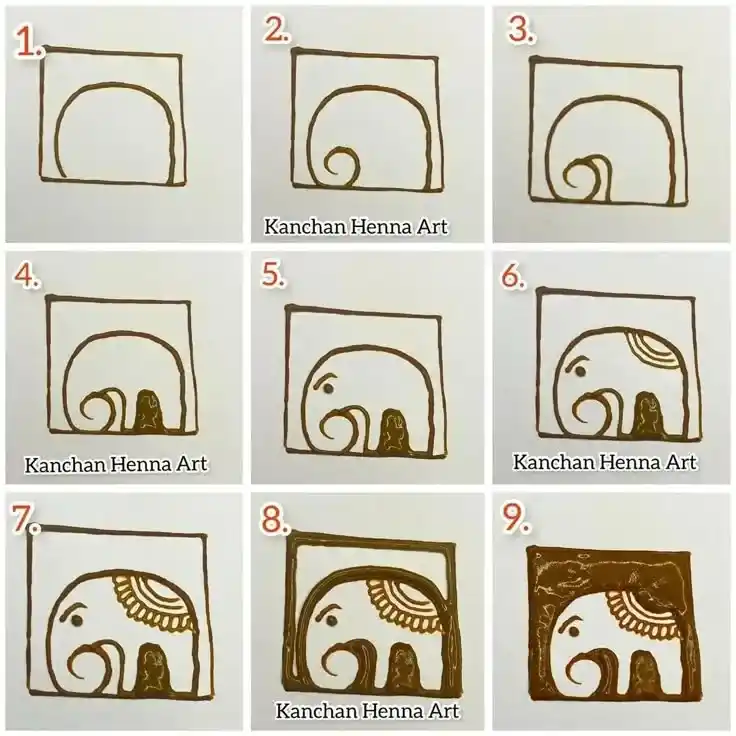
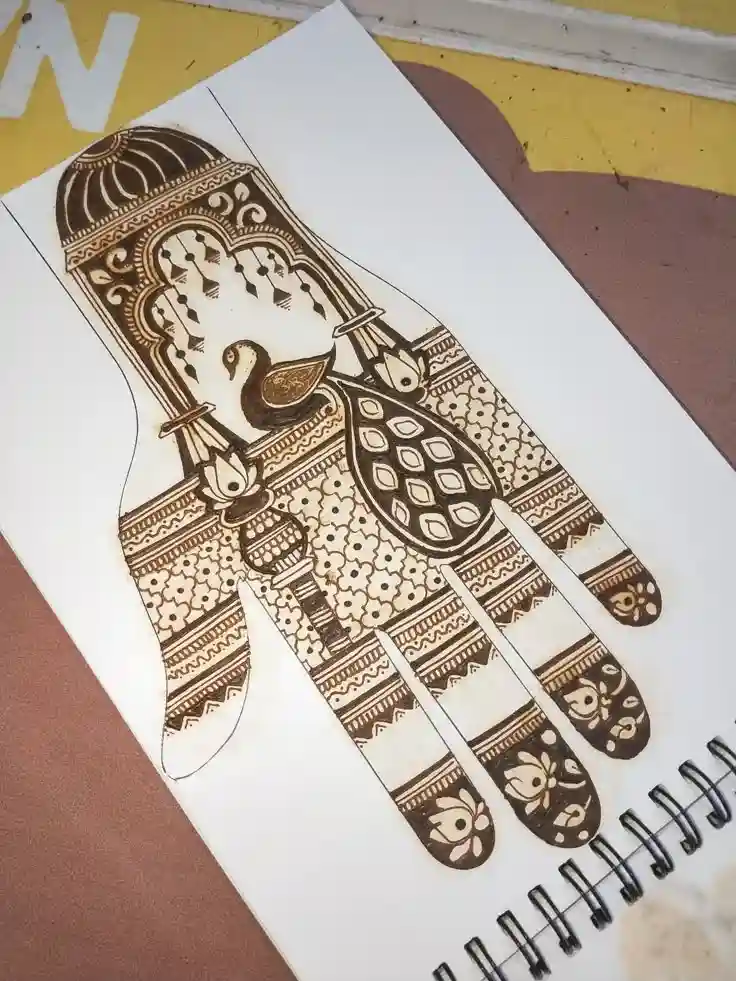
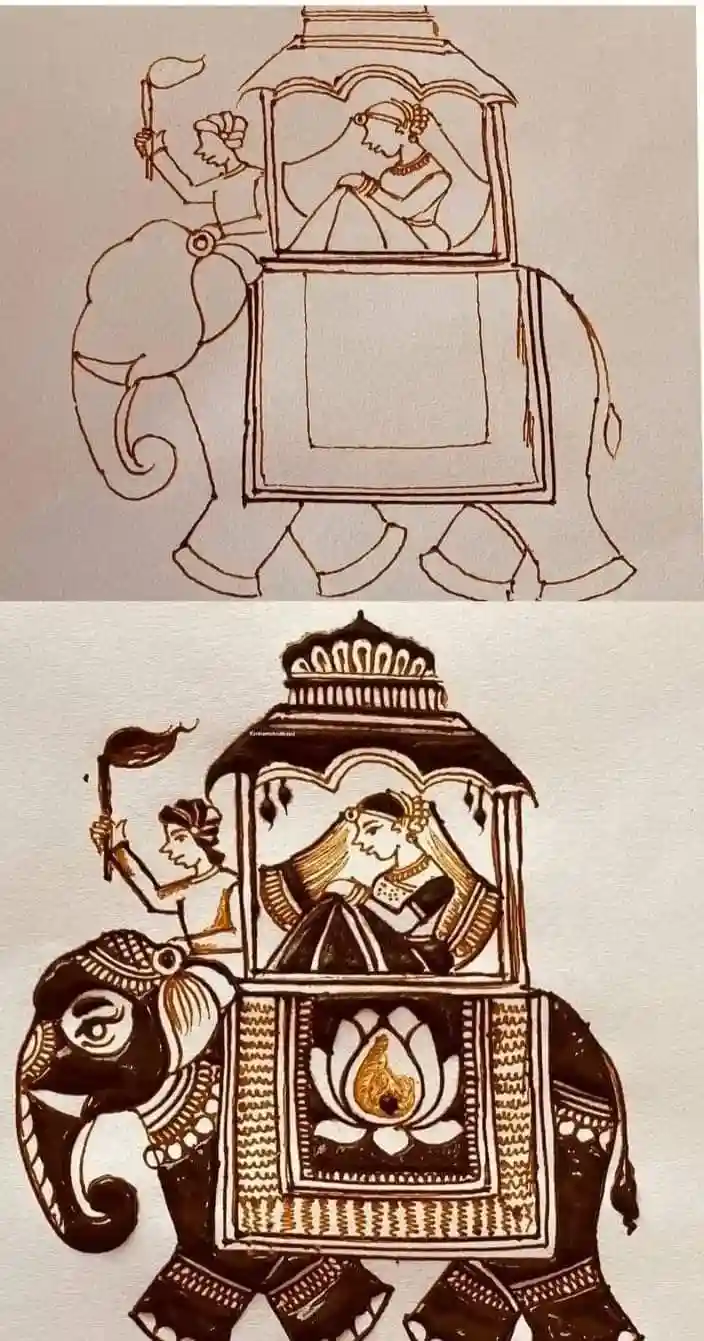
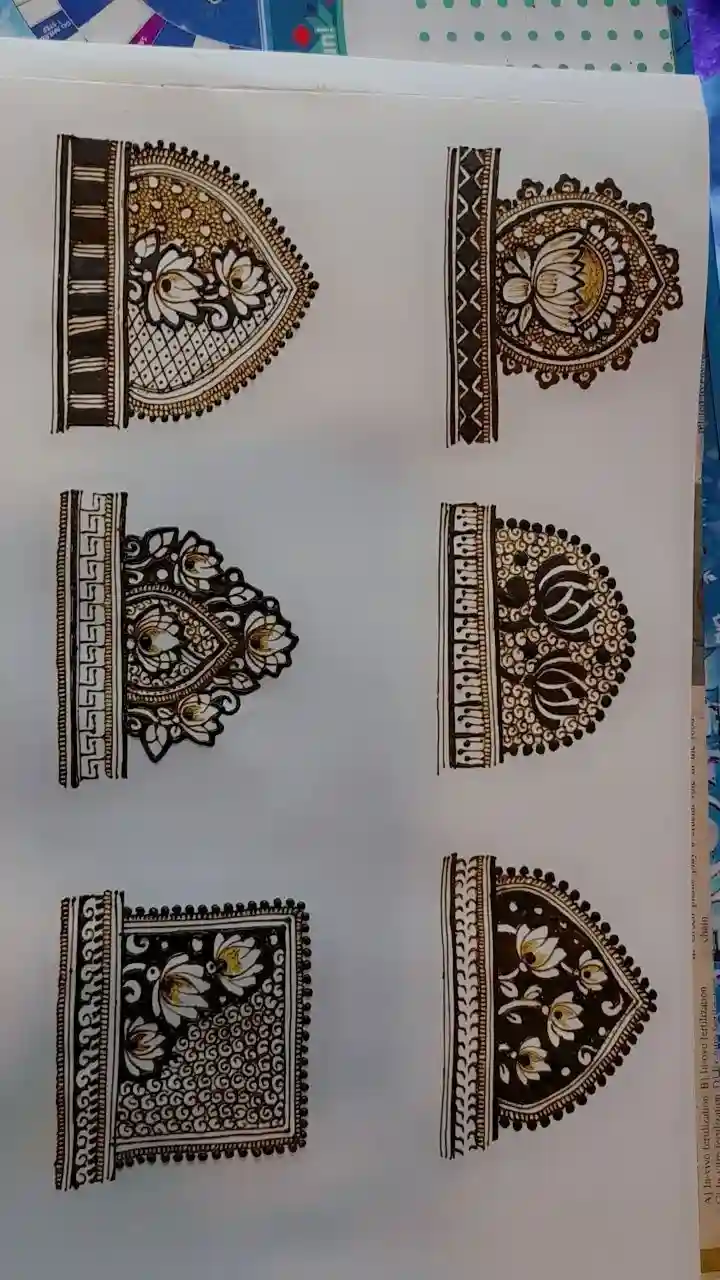
Step 2: The Main Elements on the Palm
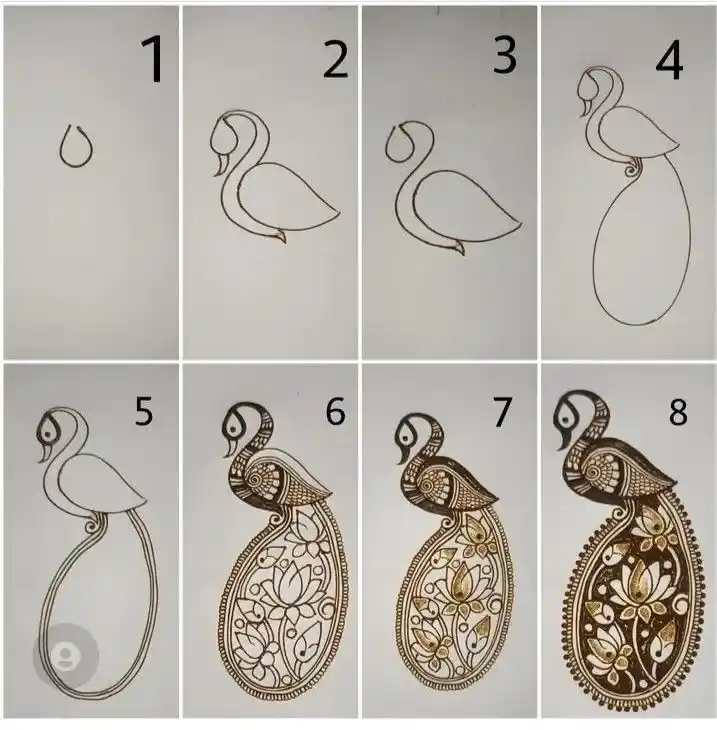
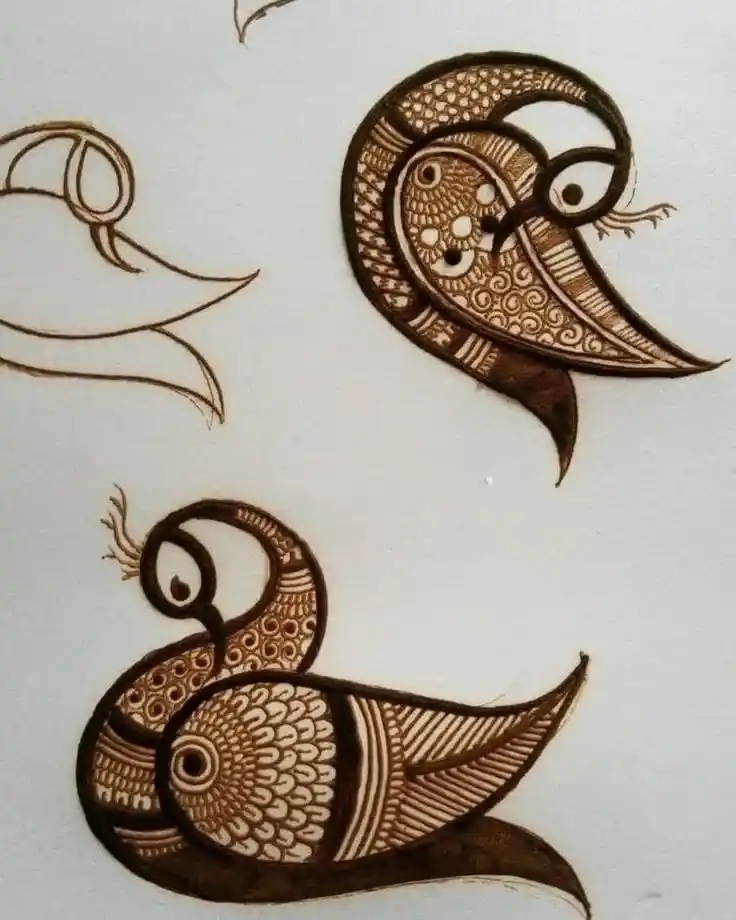
Begin by creating a large mandala, or flower, in the middle of the palm. Then, stretch the design outwards. You can include traditional designs such as peacocks or paisleys.
Make sure the shapes are simple.
Step 3: Covering the Fingers
For a bridal style, it is common to cover the fingers completely. You can choose intricate designs such as checks. It is also possible to make simple, flowing patterns that fit the palm.
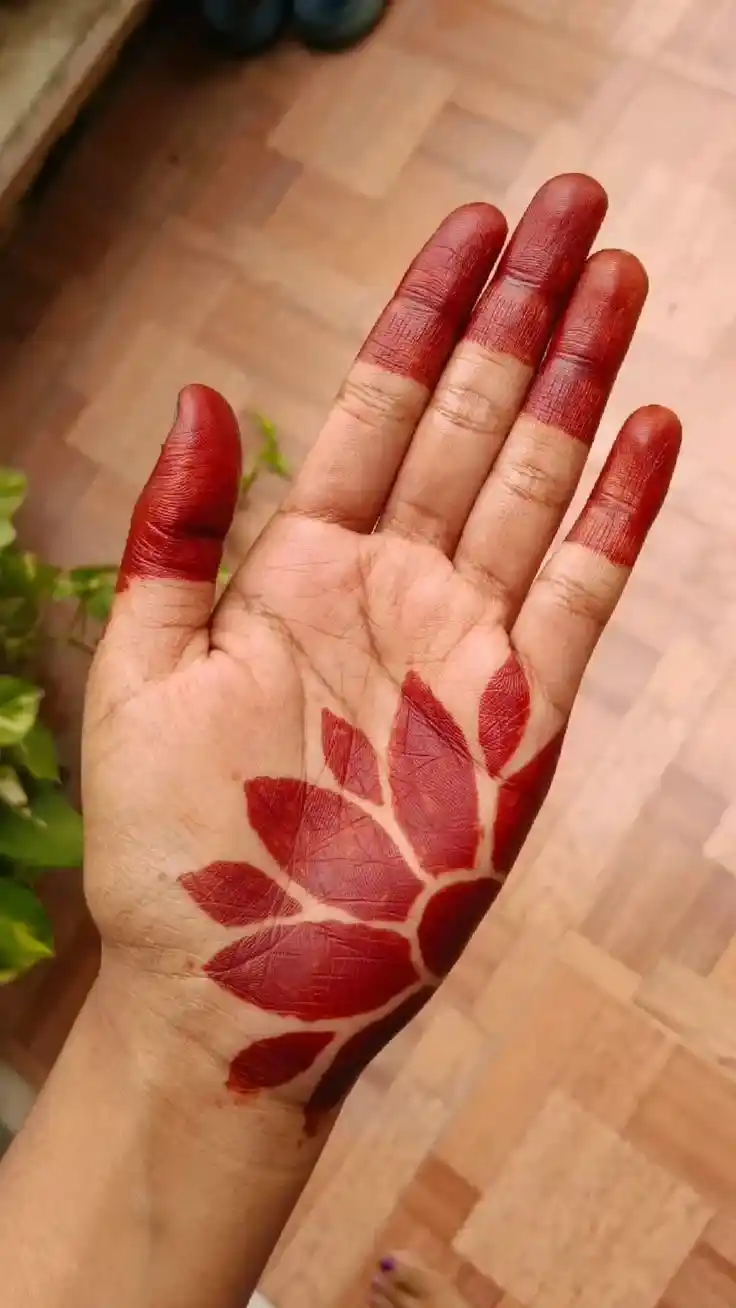
The fingertips can be sprayed with henna to get an intense, dark colour.
Step 4: The Wrist and Arm
Spread the pattern from your palm onto your wrist. Make a large bracelet here. Then, you can continue to create an easier pattern on your arm. If you want a minimalist style, you don’t need to extend up to the elbow.
A style that is only a couple of inches upwards is great.
I hope these suggestions will help you. Remember that mehndi is a form of art. It’s about having fun and being creative.
RELATED POST: 75+ Ring Ceremony Mehndi Designs (With Photos)
Frequently Asked Questions (FAQs)
1. How can I get started learning mehndi design step by step at home?
Start by working on simple shapes such as dots, lines, and curves on a piece of paper. You can then follow easy tutorials similar to those in this blog article.
2. What is the most straightforward mehndi style for someone new to mehndi?
The most straightforward designs are dots, tiny flowers, or a single trail of vines. Finger-only designs are simple and fast to create.
3. How do you start a simple mehndi design?
Always start with the most critical component, such as an extended flower or mandala. Then, you can build the remainder of the pattern around the main element. This will help keep the design in balance.
4. Do I have the ability to draw a simple Arabic mehndi design step-by-step for myself?
Yes, you can. Arabic designs seem complicated; however, they are based on simple, flowing patterns. Begin with a central flower and a diagonal vine as I have shown you.
5. How long should I keep the henna to dry for an effortless mehndi style?
For any design, either simple or elaborate, you can apply the henna paste for a minimum of 4 to 6 hours. The longer it is left on, the darker the colour will become.

I frequently make posts on Facebook, Medium, YouTube, and Instagram. Visit my social media pages to see other beautiful mehndi designs.
Image courtesy: Instagram and Pinterest
Related Posts:
| Modern Instagram Trendy Mehndi Designs |
| Bracelet Mehndi Designs for Hands |
| Simple Mehndi Design Ideas |
| Simple Circle Mehndi Designs |